YOGA SHOP
  • BLOG
  • By Sandhya De Angelis

  • By Riya Vyas

  • By Babetta

  • ABOUT US
  • Add description, images, menus and links to your mega menu

  • A column with no settings can be used as a spacer

  • Link to your collections, sales and even external links

  • Add up to five columns

  • Add description, images, menus and links to your mega menu

  • A column with no settings can be used as a spacer

  • Link to your collections, sales and even external links

  • Add up to five columns


  • September 08, 2022 5 min read

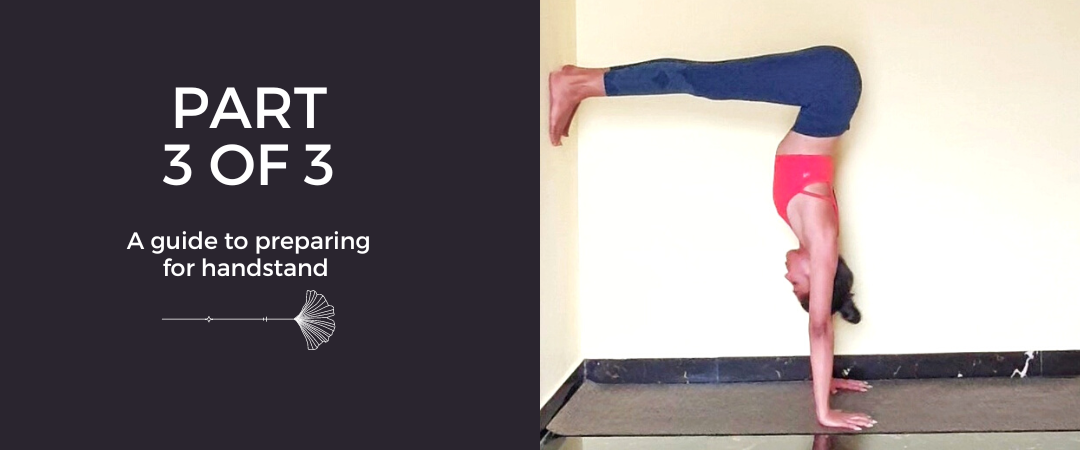
    Learning how to do a handstand can be a really fun and rewarding pose to practice, but it does take some preparation. In this blog post which is a last in the series of 3 posts, we'll outline some tips to help you finally go upside down. Keep in mind that everyone progresses at different rates, so don't worry if you're not able to do everything perfectly right away – just take things one step at a time and have patience!

    There are 3 steps to working towards handstands. First, we work on strengthening your arms and shoulders. This will help to better support your weight when you're upside down. Second, we focus on strengthening the core. A strong core will help to maintain balance and control while in the handstand position. Finally, we need to make sure the spine is flexible and your joints are agile. This will help to move into and out of the handstand position with ease.

    The trick in this last phase of preparation is to keep your practice mobile and not static. Here are the 7 ways you can condition the spine and hips for a full handstand -

    1. Ardha uttanasan or Standing Half Forward Bend:

    handstand tutorial

    Stand facing the wall with the palms touching the wall at hip level. Walk back with your feet while pressing the palms on the wall so that your body makes a 90 degree angle from the hip. Hold for 12  breaths and then release.

    This asana stretches the hamstrings, calves, and hips while lengthening the spine. It also strengthens the ankles and knees.

    2. Utithahastapadangushtasan 1 or Extended Hand-to-Big-Toe Pose with foot on wall:

    handstand tutorial

    Stand in front of the wall and take one leg up. Straighten both legs by keeping the lifted leg 90 degrees from the standing leg. Hold each leg in position for 6-8 breaths and change. Repeat each side twice.

    This asana helps stabilise the hips while opening the back of the knees and thighs. It also helps to open up the hips. 

    3. Ekapada-adhomukhaswanasan or One legged downward dog:

    handstand tutorial

    Start in Adhomukhaswanasan and then keeping the legs strong, lift one leg at a time while keeping both legs straight. Hold for a few seconds and then change the leg. Repeat 4-6 times.

    This dynamic way of practicing the posture, strengthens the quads, hips, arms and shoulder while elongating the spine. This posture teaches you to take some weight on the arms and upper back.

    4. Ardha adhomukhavrikshasan or Half handstand:

    handstand tutorial

    Sit in dandasan with feet touching the wall and place arms next to the hips. Then turn around and maintain the arm position and walk the feet up the wall. Keep the arms as wide as your mat and the feet shoulder width apart. Hold for 4-6 breaths, release and try again.

    This posture further pushes the envelope in terms of taking weight on the arms and learning to stay upside down. It also helps to balance the hips on top of the spine. 

    5. Half handstand with lifting 1 leg at a time:

    handstand tutorial

    Start in half handstand and lift one leg at a time up towards the ceiling while keeping the muscles gripped and strong. Hold each leg up for a 3-4 breaths and get it back on the wall to change. Repeat on each side 3-4 times.

    This asana helps to build strength in the arms, shoulders, and back while lengthening the spine. It also helps to open up the hips.

    6. and 7.  Adhomukhavrikshasan or handstand variations on the wall:

    handstand tutorial

    Start in a half handstand position and walk your feet up the wall while simultaneously walking your hands closer to the wall till more weight has shifted to the hands. The wall acts as a support so you can learn what it feels like to do a handstand without having to lift up directly into one.

    Place your palms shoulder width apart 8-10'' away from the wall and kick up to handstand with your heels resting on the wall. Once you lift up, focus on broadening your shoulder and lifting up from the arms, elongating the spine and firming up the legs. Hold for a few breaths and come down. Repeat in your own pace.

    8. Adhomukhavrikshasan or handstand:

    handstand tutorial

    Once you have learnt to kick up into handstand and stay for a few breaths, slowly learn to practice how to get off the wall one leg at a time. Keep one leg on the wall and move the other leg towards the ceiling

    Finally there are lots of questions that people have about handstands, so we've compiled a list of FAQs to help you out.

    1. How hard is it to do a handstand?

    Doing a handstand is no easy feat. It takes a strong upper body and a lot of practice to be able to balance yourself on your hands. Even then, it can be challenging to hold the position for more than a few seconds. But with practice and preparation, anyone can learn how to do a handstand. The key is to start slowly and build up your strength over time. So don't get discouraged if you can't jump up in your first attempt. Prepare your arms and then your core before you kick up on the wall.

    2. Do you need to be strong to do a handstand?

    While it's certainly true that you need a certain level of strength to do a handstand, there are other factors that are just as important. Balance and flexibility are important, as you'll need to be able to kick your legs up over your head while keeping your back straight. You'll also need to overcome your natural fear of falling.

    3. Who should not do a hand stand?

    People with neck, shoulder, wrist or back injuries should avoid hand stands, as the position can put significant strain on these areas. In addition, people with high blood pressure or heart conditions should also avoid hand stands, as the position can cause a sudden increase in blood pressure. Finally, pregnant women should also avoid hand stands, as the position can put unnecessary pressure on the abdomen. While hand stands may look easy, they require a great deal of strength and experience to execute properly. As such, it is important to be aware of your limitations before attempting this challenging move.

    4. How long does it take to learn how to do a handstand?

    It can take anywhere between 2 months to a year to learn how to do an independent handstand. For beginners, the key is to take things slowly and to focus on building up strength and stability. A good starting point is to practice against a wall, using your hands to help support your body weight. Once you feel confident in your ability to hold the handstand position, you can gradually begin to move away from the wall. Remember, it's important to progress at your own pace - there's no need to rush things. With a little patience and effort, you'll be doing handstands like a pro in no time!

    Sandhya is wearing Baka leggings in deep teal and Bharni bra top in koi.

    Leave a comment

    Comments will be approved before showing up.